As a slight chill fills the Central Florida air, fall crafts present a wonderful way to embrace the season. While we may not experience the fall season to the full extent in the Sunshine State, it is always exciting to dive into a new season and get the creative juices flowing. Here are four delightful fun fall crafts: leaf sun catchers, corn husk dolls, finger painting, and acorn/pinecone creatures. Let’s dive into how to create each of these charming projects!
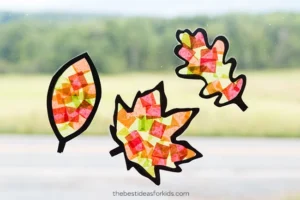
Leaf Sun Catchers
Materials Needed:
– Freshly fallen leaves (various shapes and colors)
– OR Fall themed colored tissue paper if the leaves have not changed where you are
– Contact paper or clear adhesive laminating sheets
– Scissors
– String or fishing line (for hanging)
– A window (for displaying)
Instructions:
- Collect Leaves: Take a nature walk with friends or family to gather a variety of leaves. Look for different shapes and sizes to create an interesting display.
- Prepare the Contact Paper: Cut two pieces of contact paper or laminating sheets to your desired size. Make sure they’re large enough to encapsulate your leaves. To get more in the spirit of the season, you could cut in the shapes of leaves, trees ,or even pumpkins.
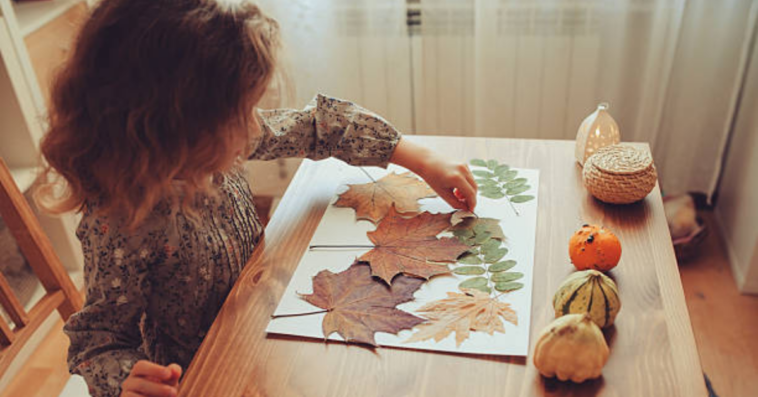
- Arrange the Leaves: Peel the backing off one piece of contact paper and lay it sticky-side up. Arrange your leaves (or tissue paper) on top, creating a beautiful composition.
- Seal the Leaves: Once you’re satisfied with the arrangement, carefully place the second piece of contact paper over the leaves, sticky side down. Press out any air bubbles to ensure a good seal.
- Trim and Hang: Cut around the edges to create a neat shape. Punch a small hole at the top and tie a piece of string or fishing line to hang it in a sunny window. The sunlight will illuminate the colors of the leaves, creating a stunning display!
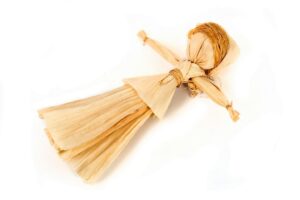
Corn Husk Dolls
Materials Needed:
– Dried corn husks (available at craft stores or you can dry your own)
– Twine or string
– Scissors
– Fabric scraps (for clothing)
– Markers (for facial features)
Instructions:
- Prepare Corn Husk: If using dried corn husks, soak them in warm water for about 10-15 minutes to make them pliable.
- Form the Body: Take three corn husks and layer them together. Fold them in half to form the head and body. Secure the fold with twine, tying it tightly.
- Create the Arms: Take two additional corn husks, fold them in half, and tie them at the center to create arms. Attach them to the body by tying them around the waist.
- Make the Hair: Use a few strands of corn husk or yarn for hair. Tie it at the top of the head with twine.
- Dress Your Doll: Use fabric scraps to create clothing for your doll. You can cut out a dress or shirt and tie it around the body. Use markers to draw facial features to give your doll character.
- Display or Play: Your corn husk doll is now ready! Place it on a shelf or use it for imaginative play.
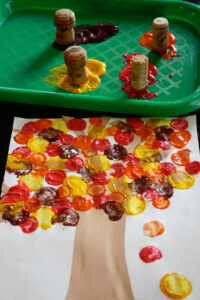
Finger Painting
Materials Needed:
– Non-toxic finger paints (or homemade using flour, water, and food coloring)
– Large sheets of paper or cardboard
– Aprons or old shirts (to protect clothing)
– A flat surface (like a table or outdoor space)
Instructions:
- Set Up Your Space: Lay down newspaper or a plastic tablecloth to protect your surfaces from paint spills.
- Choose Colors: Pour small amounts of finger paint onto your paper or cardboard. Choose fall colors like reds, oranges, yellows, and browns for a seasonal touch.
- Get Creative: Remove shoes and socks for a fun tactile experience! Use your fingers to swirl, splatter, and create designs. Encourage everyone to express themselves freely.
- Explore Textures: Add leaves, pine needles, or other natural materials to your artwork for extra texture. Press them into the paint for an interesting effect.
- Let It Dry: Once finished, set the artwork aside to dry. This is a great opportunity to discuss the colors and patterns of fall!
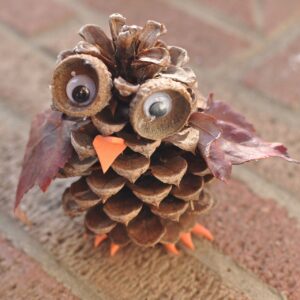
Acorn and Pinecone Creatures
Materials Needed:
– Acorns and pinecones (found in your yard or local park)
– Googly eyes (optional)
– Craft glue
– Pipe cleaners (for legs and antennas)
– Markers or paint (for additional decorations)
Instructions:
- Gather Natural Materials: Collect acorns and pinecones. Look for a variety of sizes and shapes to create different creatures.
- Design Your Creatures: Decide what type of creature you want to create. It could be a bug, a bird, or a whimsical character.
- Assemble the Body: Use the pinecone as the body and acorns for the head and feet. Glue them together securely. If you want, add googly eyes to give your creature personality!
- Add Details: Use pipe cleaners to create legs, antennae, or even wings. Bend and shape them as desired, securing them with glue if needed.
- Personalize: Use markers or paint to add additional decorations. You could draw patterns or give your creature a fun name.
- Display Your Creatures: Once your creations are dry, find a special spot to display them at home or even in your garden!
Conclusion
These fall crafts are not just fun activities; they also foster creativity and provide an opportunity to connect with nature. Whether you’re enjoying a quiet afternoon alone or gathering with loved ones, each project allows for personal expression and artistic exploration. So, gather your materials, embrace the autumn spirit, and let the crafting begin! Happy Fall!





Comments